pictures, ideas, and commentary on a variety of arts and crafts projects at northwoods, mostly by judyfunk
Tuesday, April 19, 2011
Discharge Printing with DeColorant
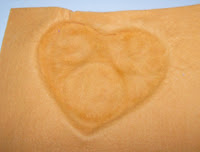
REVERSE PRINTING! An easy way to get a light print on a dark ground. We tested on a black cotton tee with excellent results. We also did some on a dark orange heavy stock paper, loved it!
Materials:
First insert a protective sheet inside the tee shirt, so the color remover won't bleed through to the back. You can use cardboard or plastic. DO NOT use corrugated cardboard because the texture will interfere with the print,
Here's the tee stretched nice and flat on the ironing board with the insert in place.
Apply self adhesive stencils. Feel free to play with the background/ negative areas as well as the peeled-out positive shapes, (shown here with a masking tape border to protect the surround material).
Spread the decolorant discharge paste on the open areas. Like buttering toast; thicker paste gives you a higher discharge value...and faster too!
...Let it dry, then use a hot iron to set it off and cure it.
Be sure to cover the design area with a press cloth for heat setting to protect the iron from the paste, and vice versa. We used a muslin strip, but newsprint works.
...mmm...one potato, two potato, three potato... Peel off the stencil paper...
et Voila! DISCHARGED! Wait a day or two after heat setting to wash, for optimal results.

Materials:
- Dark ground non-synthetic fabric (100% cotton works well. Check the tag on your tee).
- Discharge ink, Soft-Scrub with Bleach, or DeColorant
- Design stencil or screen (We used peel n etch: self-adhesive repositionable stencils from the glass etching cupboard...re-usable, cross-media fun designs)
First insert a protective sheet inside the tee shirt, so the color remover won't bleed through to the back. You can use cardboard or plastic. DO NOT use corrugated cardboard because the texture will interfere with the print,
Here's the tee stretched nice and flat on the ironing board with the insert in place.
Apply self adhesive stencils. Feel free to play with the background/ negative areas as well as the peeled-out positive shapes, (shown here with a masking tape border to protect the surround material).
Spread the decolorant discharge paste on the open areas. Like buttering toast; thicker paste gives you a higher discharge value...and faster too!
...Let it dry, then use a hot iron to set it off and cure it.

Be sure to cover the design area with a press cloth for heat setting to protect the iron from the paste, and vice versa. We used a muslin strip, but newsprint works.
...mmm...one potato, two potato, three potato...
 Peel off the stencil paper...
et Voila! DISCHARGED! Wait a day or two after heat setting to wash, for optimal results.

Sunday, December 26, 2010
Thursday, November 11, 2010
paper cookies
Prep a nice fine pulp, colored or plain. You can make bags full, ahead of casting session. Wet pulp keeps well under refrigeration. We also dry it in blocks and rehydrate as needed for small projects.
Fill the mold with wet pulp. This piece has a facing of white wild-flower seeded sheet, pressed first, with a backing sheet of colored pulp.
 Lay absorbent felt or towelling over the mold and press evenly to remove water and compress fibers. We love microfiber towels for this; big sponges work well too.Press with hand, stomp brush, sponge or small roller. Finish with tea towels or paper napkins to check with fingertips for complete water press-out.
STOMP - big flat head stencil brush shown next to a very wet towel, in place over pulp in mold.
To remove cast, first free edges all around,
then gently lift towards the center
working from a few outside starting points.
Support paper from underneath as you remove it. Wet paper is quite fragile.
Finished cast, next to mold.
Wednesday, November 10, 2010
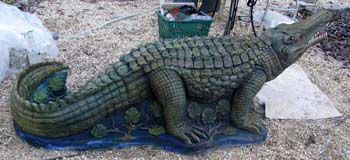
concrete - painting the gator
Thursday, November 4, 2010
Wednesday, September 15, 2010
paper
rrgh waiting for some online bookkeepeeng downloads.
Takes fo'eva..
.the upside? Had time to find this blog again!
This post = tapping fingers on desk.
Visualize us
sitting with legs crossed (below the knees) in our 40s secretarial glamor, tapping a wellshod foot to some vintage swing...moderate, patient as ever.
Something like this...
 Or moving along with Testing slip. This was on sculpey, greenware, and NSP kleenklay. *Note: try this again, covered and damp-boxed. They dried too fast on the edges and
Takes fo'eva..
.the upside? Had time to find this blog again!
This post = tapping fingers on desk.
Visualize us
sitting with legs crossed (below the knees) in our 40s secretarial glamor, tapping a wellshod foot to some vintage swing...moderate, patient as ever.
This one?
 hm hah, nope, not that one. Don't we WISH we were in studio carving.
 hm hah, nope, not that one. Don't we WISH we were in studio carving.
 Or moving along with Testing slip. This was on sculpey, greenware, and NSP kleenklay. *Note: try this again, covered and damp-boxed. They dried too fast on the edges and
 of course then
they cracked.
ok all downloads done...thanks for your time :~).. ttfn
Tuesday, September 7, 2010
moldmaking and other events
Kickin Devil Cafe will finally get a big ol' bronco on the front of the cafe. Size about 6' x 6'; plan is to paint the open stencil areas black with a sponge/giant stomp, then go in with a brush later IF it cools off enough to work outside on the same day we have no rain, on the same day two tall ladders are available, and WHEN mj picks up a gallon of black exterior latex.
The image is spliced onto two 3' strips, then cut out with yer basic exacto. Love those razor sharp edges of a new blade! Makes it so easy. *Note to Mom, "Look Ma, no blood!"
The image is spliced onto two 3' strips, then cut out with yer basic exacto. Love those razor sharp edges of a new blade! Makes it so easy. *Note to Mom, "Look Ma, no blood!"
Thursday, September 2, 2010
Dream & Do
SO, this has been a Very Longtime Dream.
A place of our own, a space for inspiration and exploration
with many tools and toys
and open discussion of how, what and a glimpse of why I create.
Starting with some pictures from my back pages...these are some stepping stones cast in concrete. Started as carvings...some of them were foam blocks, some plaster, some plastilena, some clay and several were combinations, like plaster over foam.
The intent was to create stone circles for garden paths using the symbols of Eight major world religions. The garden is for many of us, our spiritual home. The ground zero, if you will, of our connectivity with the web of life.
I don't really consider myself a good gardener but mm mm I love dirt. My dog's a digger. Both of us really appreciate that good clean dirt smell. Pine needle dirt, clay dirt, garden loam dirt, hot dry gravel on a mountainside dirt. There's a million kind of dirt smells.
I see wine appreciation courses offered around town. Anyone up for a refreshing introductory class on the deliciousness of dirt?
Is this deletable?
Subscribe to:
Posts (Atom)


 Paper Cookies! YUM!


